配置 Neovim 太难?拥抱 AstroNvim !!!
AstroNvim 是一个美观且功能丰富的 Neovim 配置。
对于刚入门 Neovim 的新手来说,使用 astronvim,可以避免从零搭建带来的挫折感。
在安装好 AstroNvim 后,便获得了一个有模有样的 Neovim。基本的状态栏、文件管理器、模糊搜索、语法高亮等等一个基本的开发工具应该具备的功能就都安装好了。如果需要安装额外的插件,可以直接引入社区的配置,仅仅通过一行代码就能完成。
之所以能够如此高效地完成 Neovim 的配置,是因为AstroNvim 提供了一个名为 AstroCommunity 的社区驱动项目。每个用户可以为该项目贡献插件配置,也可以直接使用这个社区中的插件配置,从而避免自己安装插件时繁琐复杂的配置过程。
📄官方文档 👉 https://docs.astronvim.com
🎬教学视频 👉 https://www.youtube.com/watch?v=GEHPiZ10gOk
安装及配置
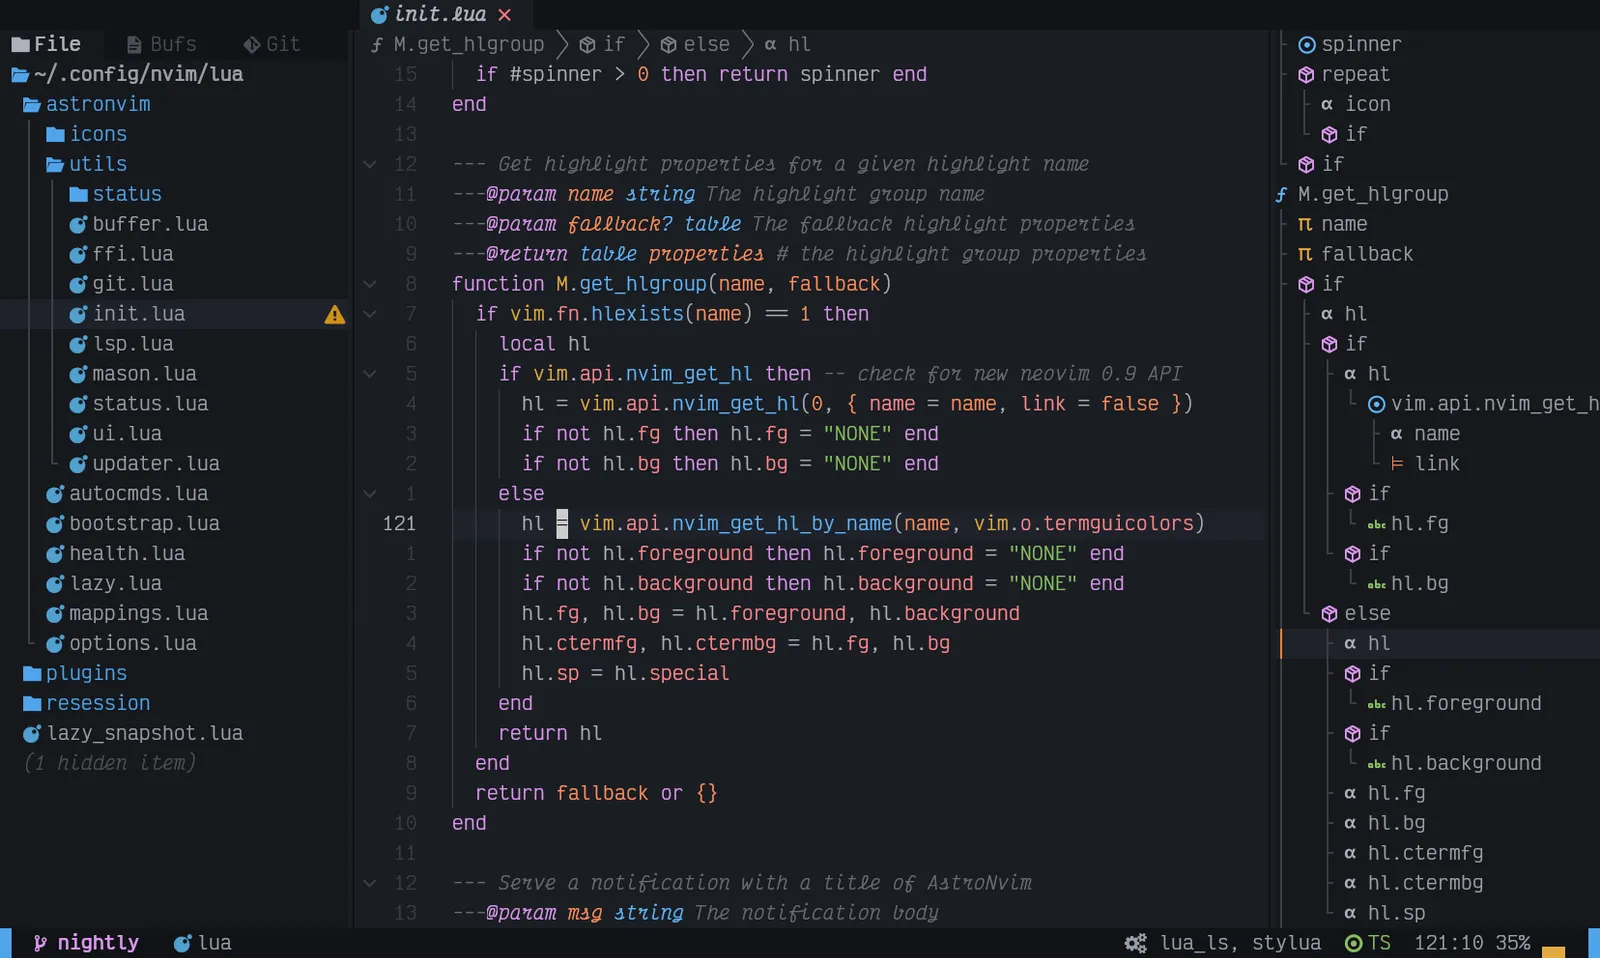
AstroNvim 将用户配置文件从中划分出来,放在 ~/.config/nvim/lua/user 路径中,这样的解耦方案使得用户可以很方便的升级 AstroNvim 以及管理自己的配置文件。
1.备份当前的 Neovim
mv ~/.config/nvim ~/.config/nvim.bak2.清理 Neovim 文件夹
mv ~/.local/share/nvim ~/.local/share/nvim.bak
mv ~/.local/state/nvim ~/.local/state/nvim.bak
mv ~/.cache/nvim ~/.cache/nvim.bak
3.安装 AstroNvim
git clone --depth 1 https://github.com/AstroNvim/AstroNvim ~/.config/nvim
nvim
进入 Neovim 后,会看插件管理器 Lazy ,在安装好依赖后,可以使用 Ctrl-q 关闭 Neovim。
4.配置用户文件
进行自定义用户配置,需要创建一个 user/ 文件夹,用于存放用户配置文件。官方提供了一份模板用于制作用户配置文件,并建议 fork 为自己的仓库。
📄模板 👉 https://github.com/AstroNvim/user_example
git clone https://github.com/<username>/<config_repo> ~/.config/nvim/lua/user添加插件
用户文件的配置非常自由。在 init.lua 中使用 plugins = { <inner_code_block> } 可以添加插件。
这样的写法并不唯一。你也可以把 <inner_code_block> 放在 plugins/user.lua 文件中,或者是 plugins 路径下任意命名的文件中(plugins/*.lua)。
它们都会合并到最终的插件配置中,lua 代码 plugins = {...} 就像目录结构 plugins/... 一样。
AstroNvim 使用 Lazy 作为插件管理器,对于 Lazy 的详细用法可查阅 📄文档
以添加 todo-comments 插件为例子。第一行是标识插件的名称,然后是依赖项,然后是插件启动时调用的 setup,或者定义 opts 字段,该字段会使用传递的参数自动调用插件的设置方法。
-- user/plugins/user.lua
return {
  {
    "folke/todo-comments.nvim",
    dependencies = { "nvim-lua/plenary.nvim" },
    config = function()
      require("todo-comments").setup{
        -- your configuration comes here
        -- or leave it empty to use the default settings
        -- refer to the configuration section below
      }
    end,
    -- 等价写法
    opts = {

    }
  }
}
由于 Lazy 使用懒加载机制,因此还需要指定插件的触发条件。以下为 AstroNvim 提供的事件:
- User AstroFile : Triggered after opening a file
- VeryLazy : Triggered after starting Neovim
- BufEnter *.lua : Triggered after opening a Lua file
- InsertEnter : Triggered after entering insert mode
- LspAttach : Triggered after staring LSPs
更多的事件可以通过 :h autocmd-events 获得
为了在打开文件时,能够使用 todo-comments 插件,我们需要为其添加 event 字段。
-- user/plugins/user.lua
return {
  {
    "folke/todo-comments.nvim",
    dependencies = { "nvim-lua/plenary.nvim" },
    opts = { },
    event = "User AstroFile"
  }
}
除了事件,我们还可以通过命令和快捷键来触发插件的加载。相应的需要添加 cmd 和 keys 字段。
-- user/plugins/user.lua
return {
  {
    "folke/todo-comments.nvim",
    dependencies = { "nvim-lua/plenary.nvim" },
    opts = { },
    event = "User AstroFile",
    cmd = { "TodoQuickFix" },
    keys = {
      { "<leader>T", "<cmd>TodoTelescope<cr>", desc = "Open TODOs in Telescope" }
    }
  }
}
使用 AstroCommunity
📦 Repo 👉 https://github.com/AstroNvim/astrocommunity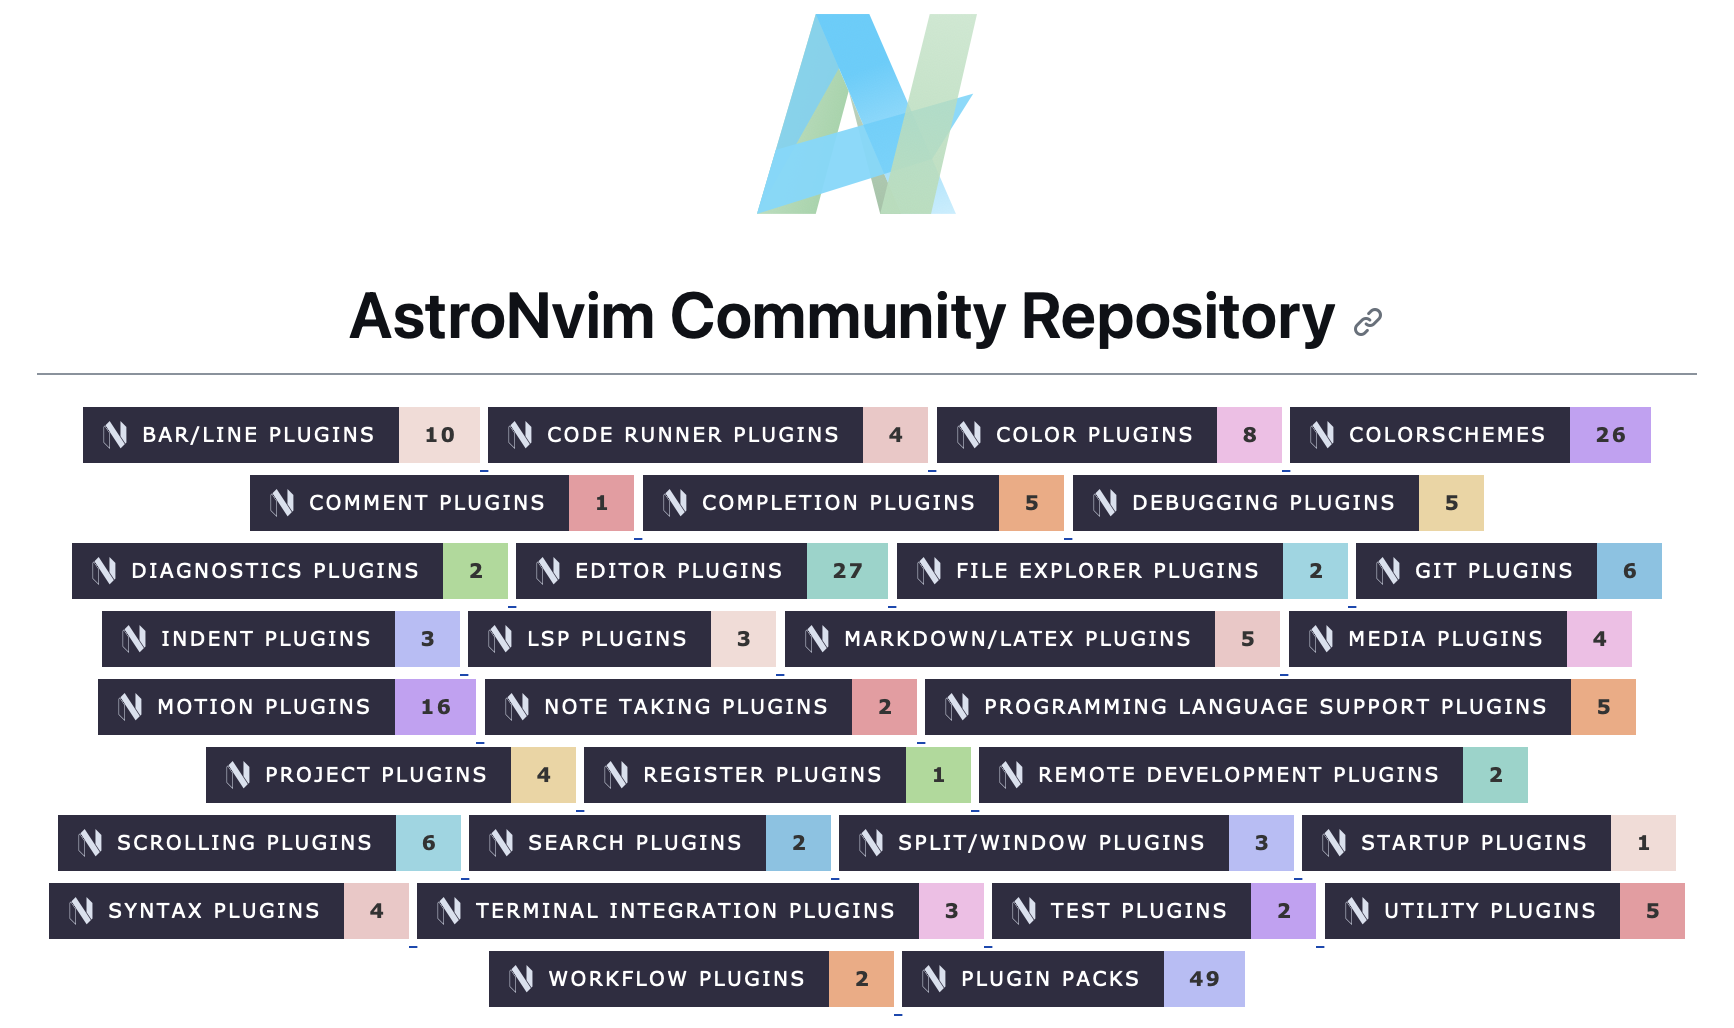
AstroCommunity 提供了大量的插件配置,如果我们要使用其中的配置,仅需在 plugins = {...} 导入即可。
例如我们要使用 codeium ,只需一行导入代码。
-- user/plugins/community.lua
return {
  "AstroNvim/astrocommunity",

  -- codeium
  { import = "astrocommunity.completion.codeium-vim" }
}
退出并重新进入 Neovim 后,Lazy 会自动安装并配置 codeium 。nice 🎉
如果对于社区的配置不满意,我们还可以在其基础上自定义。
配置以表的形式存在,通过重写表即可自定义。用户重写的表会自动拓展默认配置。
如果需要更灵活的操作,我们还可以重写方法。方法中的参数为默认表,我们可以对其修改,再将其返回供以使用。
options = function(local_vim) -- parameter is the default table to be overridden
  -- nil is the same as a key not being set, so you cannot use nil reliably
  -- when using the table override notation
  local_vim.opt.clipboard = nil -- set a value to nil to remove it from the table
  -- return modified table
  return local_vim
end,
自动命令
为了简化配置,AstroNvim 将一些自动命令事件开放给用户。
例如当只有一个 buffer 和 tab 时,我们想要关闭 tabline。
自动命令用法示例 👇
-- create an augroup to easily manage autocommands
vim.api.nvim_create_augroup("autohidetabline", { clear = true })
-- create a new autocmd on the "User" event
vim.api.nvim_create_autocmd("User", {
  desc = "Hide tabline when only one buffer and one tab", -- nice description
  -- triggered when vim.t.bufs is updated
  pattern = "AstroBufsUpdated", -- the pattern is the name of our User autocommand events
  group = "autohidetabline", -- add the autocmd to the newly created augroup
  callback = function()
    -- if there is more than one buffer in the tab, show the tabline
    -- if there are 0 or 1 buffers in the tab, only show the tabline if there is more than one vim tab
    local new_showtabline = #vim.t.bufs > 1 and 2 or 1
    -- check if the new value is the same as the current value
    if new_showtabline ~= vim.opt.showtabline:get() then
      -- if it is different, then set the new `showtabline` value
      vim.opt.showtabline = new_showtabline
    end
  end,
})
References
[1] AstroNvim Docs
[2] Neovim With AstroNvim | Your New Advanced Development Editor
[3] AstroCommunity